 SDD — Blog
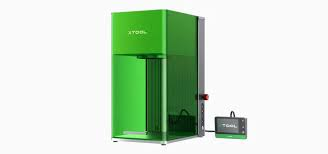
How to Align Dog Tags on the xTool F1 Ultra with a 3D-Printed Flip-Plate Jig
If you engrave lots of standard dog tags (50×29 mm), a 3D-printed flip-plate jig turns the xTool F1 Ultra into a fast, repeatable production setup. This guide shows you how to zero the jig once, keep alignment locked for both sides, and batch tags with consistent quality and minimal scrap.
What you’ll use
- xTool F1 Ultra or any fiber laser, for that matter.
- Song Dawg Designs – Dog Tag Laser Engraving Jig — Gen4
- Dog tags: stainless or anodized aluminum, 1.0–1.2 mm thick
- Isopropyl alcohol + lint-free cloth
Why use a flip-plate jig?
- Repeatable alignment: The pocket positions the tag the same way every time.
- Two-sided accuracy: The top plate indexes to the same origin, so Side B lines up with Side A.
- Speed: You zero the laser once, then reuse the same coordinates across the entire batch.
Before you start
- Mount the jig square to the bed (bolt it or use high-temp tape). Mark the origin corner on the jig.
- Set your origin at that corner and save the work offset. Don’t move the jig again until the job is finished.
- Prep two design files:
- “DogTag-SideA” with your artwork in the exact pocket location
- “DogTag-SideB” mirrored or positioned for the flip-plate, using the same origin
Step-by-step workflow
- Clean the tag. Wipe oils and dust; a clean surface engraves more evenly.
- Drop the tag into the pocket. It should seat with very light play (jig is designed at part size +0.2 mm).
- Frame and focus. Confirm the design sits inside the tag outline; verify focus height.
- Engrave Side A. Note the exact power, speed, frequency, and passes that produce the finish you want.
- Flip for Side B. Flip the tag, and engrave with your “Side B” file. Do not move the jig or change origin.
- Batch efficiently. While one tag cools, load the next; keep a steady rhythm and log your settings.
Recommended starting settings (adjust to taste)
- Focus height: Manufacturer baseline for the lens; fine-tune on a scrap tag.
- Power / speed: Start around 10–20% power and 400–800 mm/s, then adjust for contrast and depth.
- Hatch: 0.03–0.06 mm with two passes at alternating angles to reduce banding.
- Material notes: Stainless often needs slightly more power than anodized aluminum for similar contrast.
Quality checklist during the run
- Centering & margins: The design should sit consistently from tag to tag—
- Contrast: If marks look light, step up power a notch or slow speed slightly.
- Heat: If tags feel hot out of the pocket, your power is too high.
Troubleshooting
- Side-B shift (misaligned back side): Re-seat the tag, confirm the origin corner hasn’t moved, and inspect the pocket for debris.
- Faint or uneven mark: Clean the surface, increase power slightly or reduce speed, and try a second pass with a finer hatch.
- Edge burn or halos: Reduce power, increase speed, or widen hatch. Make sure focus isn’t below the surface.
Batch-production tips
- Zero once, reuse forever: Save your work offset and store the jig labeled with its origin corner.
- Logbook: Record material, finish, and successful settings. The next order becomes plug-and-play.
Safety
Follow laser safety practices. Verify the beam path with covers in place, wear appropriate eye protection, and always test new materials on scrap before running production.
Quick ROI math
If using the jig saves 90 seconds per tag and you engrave 60 tags per week, that’s 90 minutes saved. At a $60/hour shop rate, the jig pays for itself in a day or two and keeps saving time every batch.